Integration with Jira
Why use Jira integration
While Soveren provides you with the nice UI to respond to events which are happening in your infrastructure, sometimes you need to assign actions depending on what you've found. Integration with Jira provides you with this opportunity: you will be able to open a ticket directly from e.g. the policy violation event and populate it with all relevant details.
Configuring the integration with Jira
Creating a Jira integration is simple and straightforward.
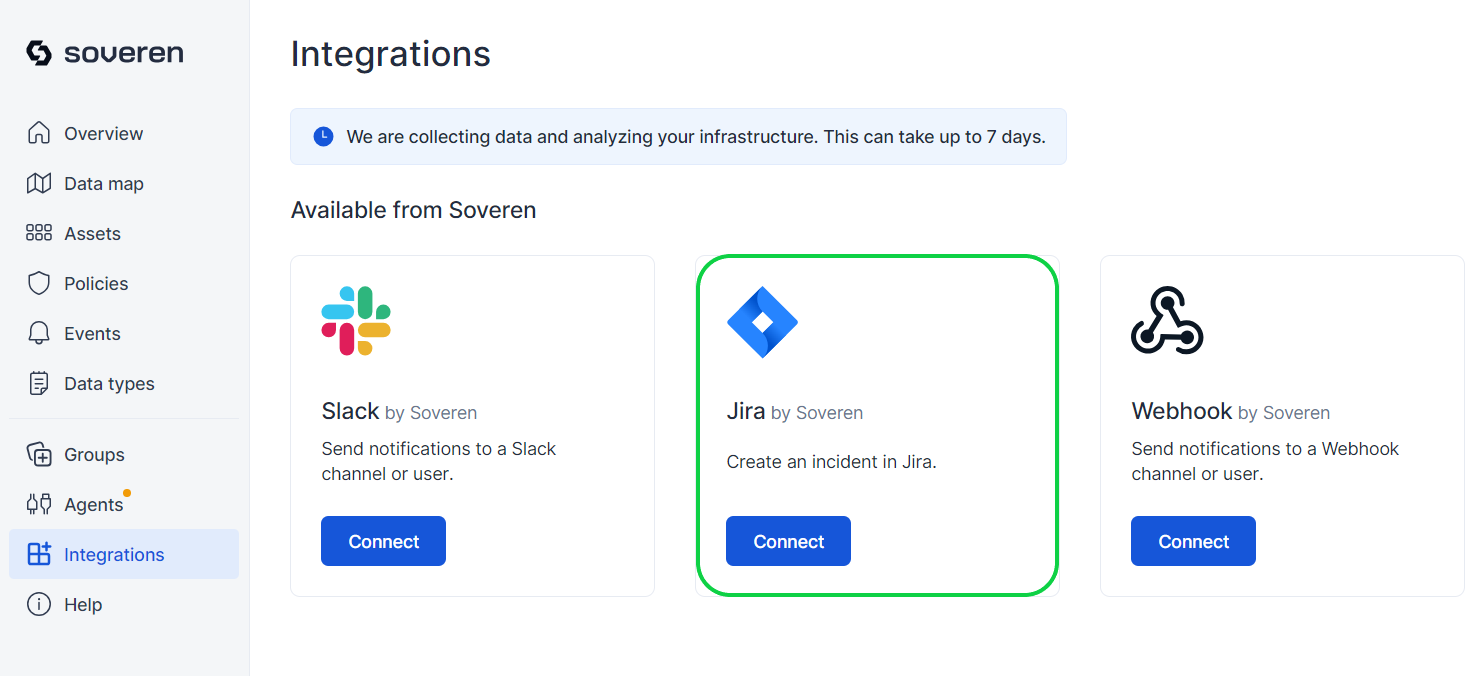
First, open the Integrations in the Soveren app, and press Connect on the Jira configuration there:
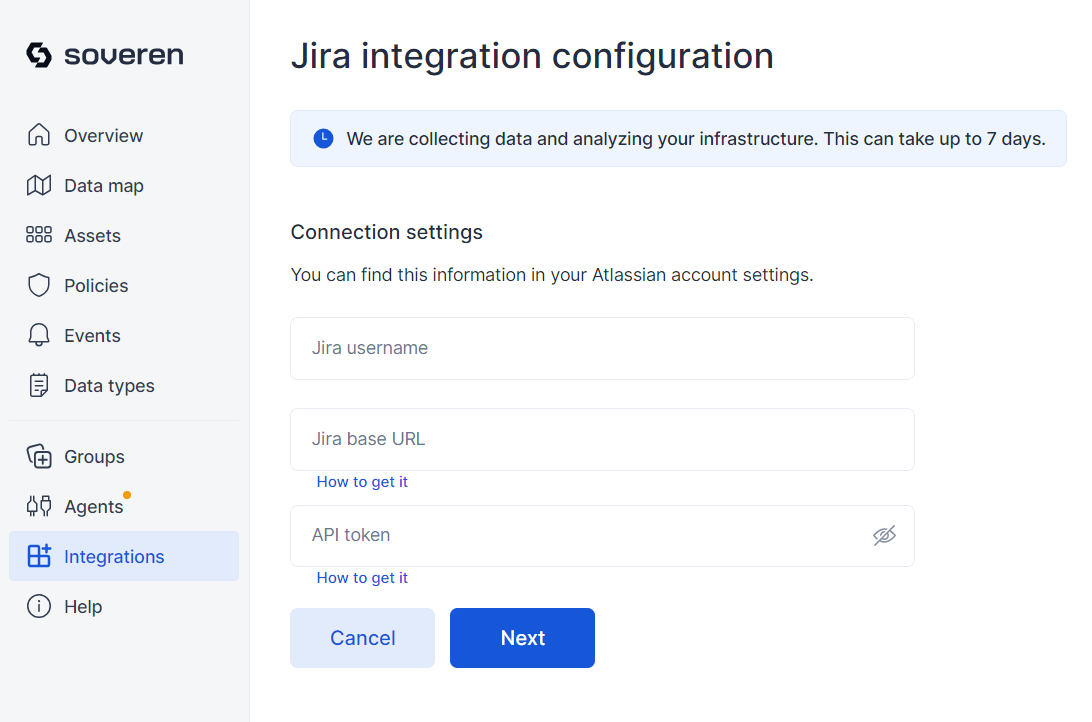
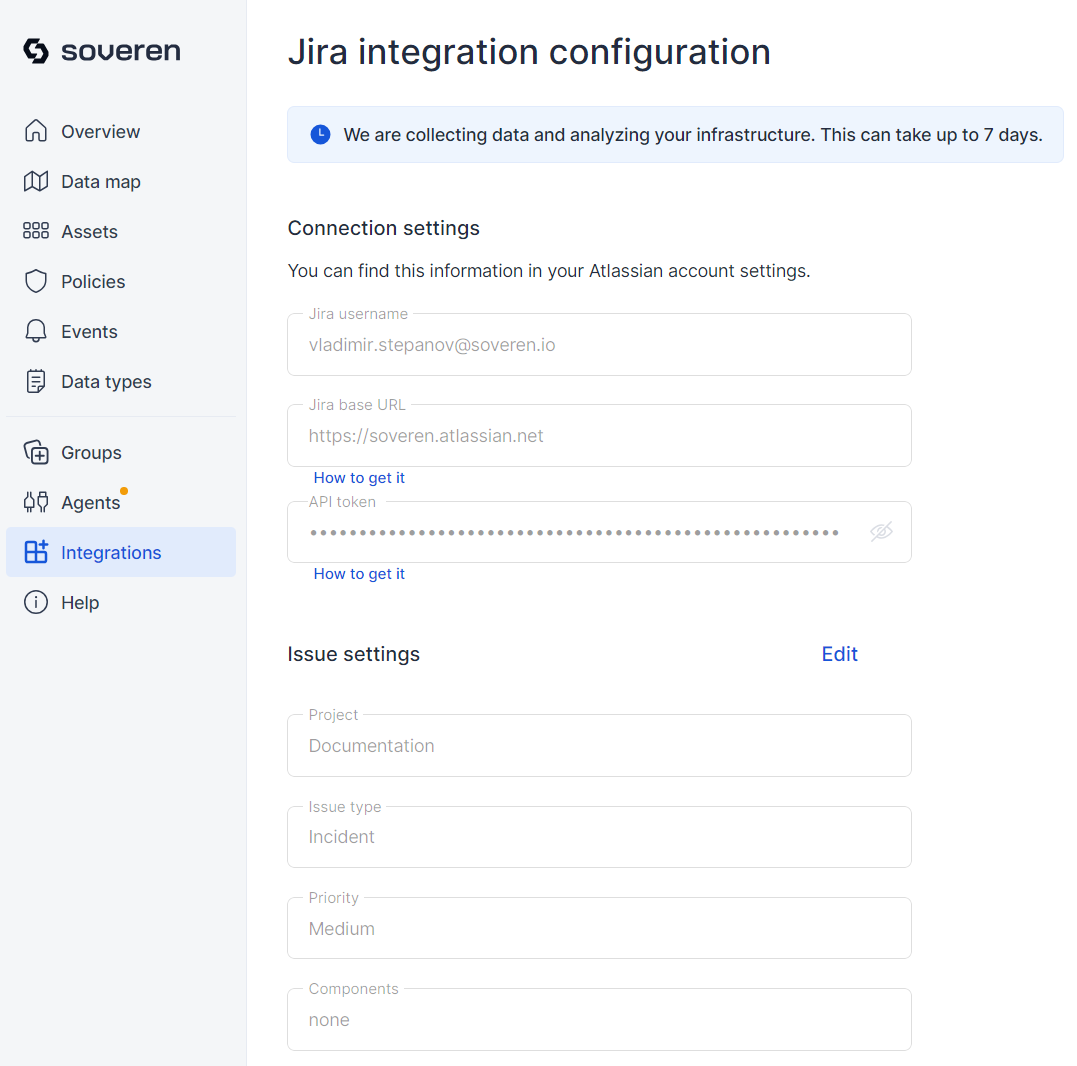
The following connection settings will open:
Here you need to provide the following:
-
Jira username: in most cases this would be your work email.
-
Jira base URL: the URL via which users access your Jira. Here's how to get it if you don't have it handy.
-
API token: a token to authenticate your Soveren app with an Atlassian cloud product. Usually you will need to generate a new one, here's how to do it.
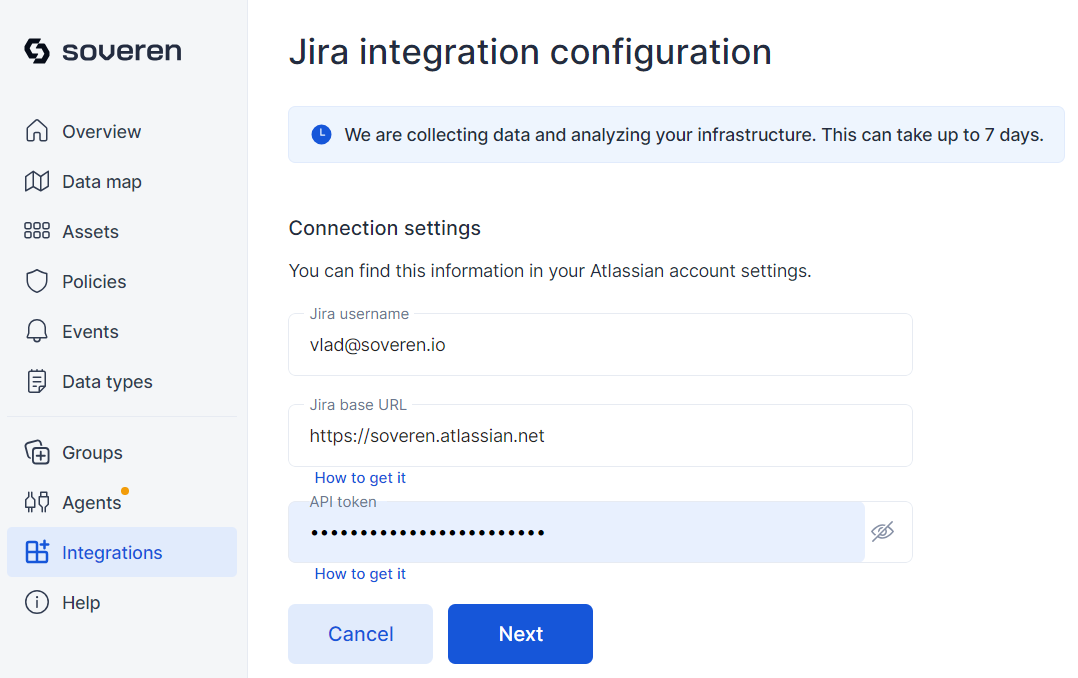
Here's how these settings should look like:
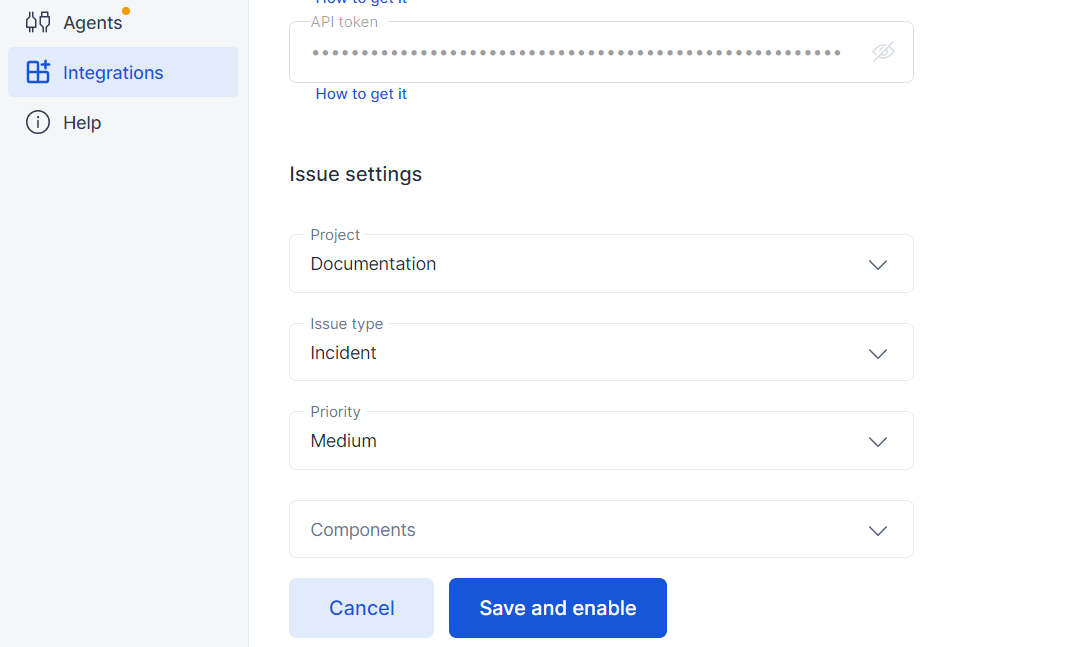
After you press the Next button, Soveren will try to establish and authenticate the connection with your Jira. If successful, you will get the following additional configuration options:
Fill in the Project, Issue type, Priority and Components according to your needs, and press the Save and enable button.
The result should look like the following:
You are all set with Jira config now. On to creating some tickets!
